As a top cryptocurrency by market cap, Ripple (XRP) is probably on your radar as a potential coin to buy. You have a few different platforms available on which you can purchase Ripple with Bitcoin. However, your options for buying Ripple with USD, EUR, or other fiat pairings are a little more limited.
A popular method to buy Ripple with fiat is to use the GateHub wallet. GateHub is built on the Ripple protocol, so it specializes in XRP exchanges.
In this guide, we’ll explain step-by-step how to buy Ripple on Gatehub, specifically using USD. Although we only cover purchasing Ripple with USD, the platform also supports EUR, CNY, and JPY trading.
To get started, create a GateHub account.
How to Create a GateHub Account
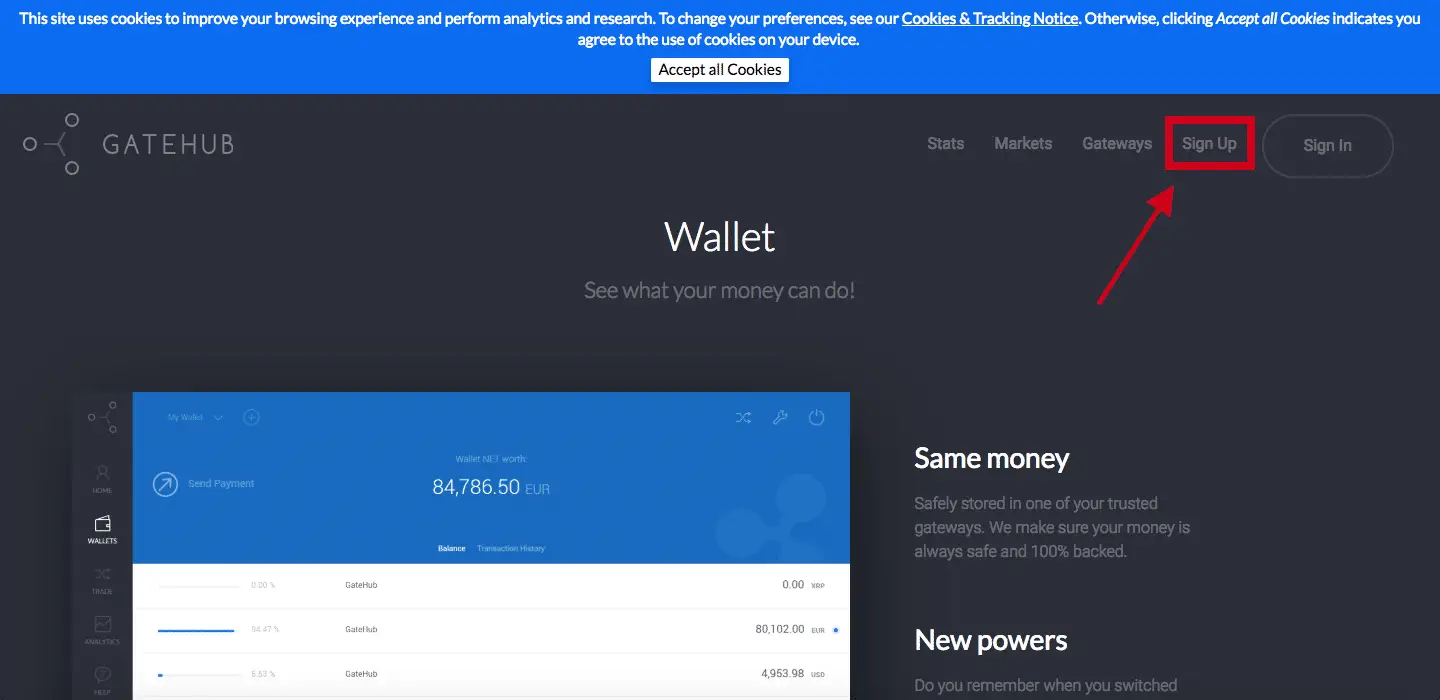
Step 1. Navigate to the GateHub website.
Step 2. Click Sign Up in the upper right-hand corner of the page.
Step 3. On the Sign Up page, enter your email and password. Additionally, complete the Captcha as well as read the GateHub Privacy Policy and Terms and Conditions. If you agree with the policy and terms, check the boxes and click SIGN UP.
Step 4. Next, you’ll receive a Recovery Key. Store this in a safe place to which only you have access. Preferably, you should write it down and keep it someplace secure.
*If you lose your password, the only way to recover your account is with your Recovery Key.*
Step 5. Once you’ve safely stored your Recovery Key, check your email. You should have received an email from GateHub. Follow the instructions in the email to activate your account.
Step 6. GateHub will most likely redirect you to the Sign In page after activating your account. If you aren’t redirected, you can navigate to the Sign In page by click Sign In on the GateHub homepage.
Step 7. Sign in using the email and password you entered when you created your account. You’re now in the wallet.
How to Verify Your Identity on GateHub
Step 8. When you first enter the wallet, you need to choose whether you’re an Individual or Company. You should most likely pick Individual.
Step 9. Before you’re able to deposit USD into the wallet, you need to verify your identity. First, provide your telephone number.
Step 10. You’ll receive a text message to that phone number. Enter the verification code from that text message onto the website.
Step 11 (Optional). Next, enter a GateHub name. Your GateHub name is similar to a username and is what you’ll use to receive funds. It’s like a public address.
Step 12 (Optional). Set a profile picture.
Step 13. Enter your personal information.
Step 14. Finally, provide a Personal ID and Proof of Residency.
Step 15. Wait for verification. This process may take up to five business days. However, for us, it took less than five minutes.
How to Deposit USD to GateHub
Step 16. After verifying your identity, you’ll be on your Home page. Scroll down and click Connect a Gateway.
Step 17. Enter your password and click Unlock.
Step 18. Choose USD.
Step 19. Confirm your Gateway selection.
Step 20. From the Home page, click Deposit/Receive from the My Wallet panel.
Step 21. Then, select Bank. You’ll see instructions on how to wire money to your GateHub account. Follow those instructions.
How to Buy Ripple on GateHub with USD
Step 22. With funds in your account, navigate to the Exchange page.
Step 23. Unlock your wallet.
Step 24. Before exchanging, ensure that “USD” is on the “Spend” side. You can toggle this by clicking the Flip arrow button in the middle of the screen.
Step 25. Enter the amount in USD (or XRP) that you’d like to exchange. The other currency amount will fill in automatically.
Step 26. Confirm that you would like to exchange USD to XRP.
You now own your first XRP and can teach other people how to buy Ripple on GateHub as well. We hope the process wasn’t too difficult. You can check your balance by navigating to your Wallet from the menu on the side.
Never Miss Another Opportunity! Get hand selected news & info from our Crypto Experts so you can make educated, informed decisions that directly affect your crypto profits. Subscribe to CoinCentral free newsletter now.


